Showing posts with label Thrifty. Show all posts

Friday, December 27, 2013

Polo to Cardigan Upcycle


    I need a hobby!  Brian agrees.  Lately, he's been begging me to find something constructive and fun to do.  When I asked why he was so insistent on me finding a hobby he mockingly muttered something about being bored and begging for a poodle, but I'm sure it was nonsense so I ignored it.  

  I already have a sewing machine and basic sewing skills, so I've decided to put them to good use.  If I'm going to spend the money that a hobby requires, then I at least want to get some use out of it.  This week I've put my sewing skills to the test and I've surprised myself with how decent I am.    Besides the purse I've made and the sweater I've re-done, I want to share my "Polo to Cardigan Upcycle" that I experimented with.  I confiscated one of Brian's old polo shirts that he never wears anymore and I transformed it into a cardigan style shirt for myself.  I like layers!  I didn't take any pictures during the process because honestly I thought it would fail miserably.  Imagine my surprise when it worked!  

So here's the sad little polo before.....


And here's my new cardigan After!


    So basically I cut the body of the shirt down to fit me using a cardigan that I already have as a guide.  Then I cut off the collar including where it buttons and cut a straight line down the front of the shirt.  Where I had cut out the collar I had to create a curved line that blended into the straight line down the front.  I lucked out and was able to use the brown fabric from the collar as the facing for the new split down the front.  I sewed the sleeves to fit my arms and then attached them to the new body.  I added a loop for the button because it was just a little too tight across my bust if I had created a button hole, instead.  I then decided it was a little to loose around the waist, so I added some elastic to gather the back a bit and make a nicer fit.
    
    I'm so excited that this actually worked.  If I find that I really like it then I'm probably going to hit up a local thrift store to find other polo's to reconfigure.  It's a lot cheaper than buying fabric!  And knowing that I got a new piece for my wardrobe while spending next to nothing makes me extra giddy.  You know......cause I'm thrifty.
Thanks for looking!

*Is it just me, or do I have freakishly pointy elbows?*

Monday, March 19, 2012

Country Style Meat-n-Beans

    Today I'm going to share a recipe.  Gasp!  It's not gourmet, but it's cheap and easy.  I know someone who reads this will appreciate it.
    It was a staple in our home when I was growing up.  My momma calls it "Country Style Meat-n-Beans."  Once, in an attempt to make it sound more appealing to a young boy she was babysitting, she called it "Cowboy Beans."  While my boys eat it well enough, they could always use some extra incentive.  They care nothing for cowboys, but both are on a Star Wars kick so I'm considering calling it "Light Force Tauntaun-n-Legumes."  I'll tell them it's what gave Yoda and Luke Skywalker their powers while living in the creepy swamp.  Hopefully they'll scarf it down and then I can sit back and giggle at them trying to use the force to move the entertainment center.  Or even better, maybe they can try to move the toys in their room from the floor to the toy box!  And we all know Luke Skywalker would never give up, so it'll get done one way or the other.  Clean their room, they will!  So good, I am!

Here's what you need:
1 lb of Hamburger Meat
1 T. of Onion (I used minced or chopped onion from a jar)
1 Bell Pepper finely chopped
1 t. of Salt
1/8 t. of Worcestershire Sauce (I just give the bottle several shakes into the mix)
2- 15oz. cans of Ranch Style Beans
2 cans of Water

    Brown your meat with bell pepper and onion.  Drain the grease.  Now add salt and worcestershire sauce and cook for approximately two minutes.  Add beans and water.  Bring to a boil.  Then turn down the heat and let simmer until blended and almost dry.  Serve over rice.  (We enjoy crackers with it, as well.)

     It really is super easy and cheap!  You can't go wrong with meat and beans.  Haven't you heard the song.....
"Beans, beans, a musical fruit.
The more you eat'em, the more you toot.
The more you toot, the better you feel.
So eat your beans at every meal!"

There's also the verse about how "they're good for your heart," but my mother would die if I recited it.

P.S.
Working, my plan is!

Saturday, December 17, 2011

DIY Teacher Gifts

    It's almost Christmas!  Yaaaaaaaaay!!!  I had hoped to have this particular project done a few weeks ago, in case anyone wanted to do the same thing for this year, but who am I kidding.  The queen of procrastination doesn't do anything a few weeks before it needs to be done.  So what is this project I speak of?   Teacher gifts!  This is my first year to do teacher gifts, and wouldn't you know that between his two schools Ian has two teachers and three paraprofessionals (I'm guessing that's a fancy word for teacher's aide).  Of course, I didn't want to spend an arm and a leg, so I thought I'd make gifts.  I found this wonderful tutorial for flower pins on Pinterest:

http://www.notmartha.org/archives/2010/04/23/a-flower-pin-for-you-favorite-mom/

So cute!  I didn't want anything too "teacher-y," and I decided that this would be a nice gift for any lovely lady.  So I went to Hobby Lobby and bought all of my supplies, including the little boxes to wrap them in.  I spent approximately $10 for all of it.  Later I went to WalMart and bought Dove chocolate to put in each little box.  That cost around $8 for two bags.  Here's the final project:
    I chose five different colors and then let Ian decide who got what color.  I think they turned out great.  It was fairly easy, but time consuming.  Each flower took approximately an hour and a half.  Of course, that includes a number of distractions.  "I'm hungry."  "I need something to drink."  "Wesley's in the bathroom and he wants you."  "Put the cat down right now!"  "Ian just hit me."  "What's that gross stuff on the floor?"  This list could go on and on and on.  I had to stop every ten minutes.
    On the link I posted above you will find a link to the tutorial and also a link titled "a few notes on what I learned."  I recommend you read the one about what she learned as well.  It has some helpful tips.  And I'll add to that.....  Do not use too much glue!  Otherwise you'll have a terrible mess.  Those little glue strings will be everywhere and your flower will look like it has a spider living in it.  Not pretty.  Another helpful note.....  Don't freak out over cutting the petals.  When I first realized I had to free hand cut each and every petal, I almost hyperventilated!  I am very much a perfectionist and I had no idea how I was going to make each petal the exact same.  Good news....  You don't have to!  I spent minutes on each of the first few petals trying to make them all the exact same size.  Minutes is a long time when you have 40 petals times 5 flowers to cut out!  I soon realized it didn't matter.  Because you're cutting each petal from squares that are the same size, they'll all be the same size.  Who would have thought....  They may not be the exact same shape, but you can't tell.

    So to wrap this up.  I put a piece of tissue paper in each box and threw some candy in it.  I figured anyone who works with 4 year old's all day deserves a little bit of chocolate.
Then I put the flower on top.
Wrapped it up.  Closed the box. Voila!
Five teacher's gifts for around $18!  I'd say that's pretty thrifty!

Merry Christmas Everyone!

Rachel


Tuesday, November 8, 2011

The Right Way to Eat a Candy Bar

    Today I am going to share with you the correct way to eat a candy bar.  And yes.  There is a correct way.  All the other ways are just plain weird. 

Step 1:  Go to the egg compartment thingy in your refrigerator door.

Step 2:  Remove the eggs and select one of the candy bars you have hidden behind them.
(Yeah, uh huh.  I bet you thought I was crazy when you heard the egg part.  This is a perfect place to hide candy bars.  Especially if you like them refrigerator cold like I do.  No one will ever find them.  My husband doesn't even know these are back there.)

(Well........he didn't until now.)

Step 3:  Unwrap this precious, life giving, sanity sustaining morsel and thank God for giving it to you. 
(By the way, 3 Musketeers are the perfect candy bar for refrigeration.  No hard caramel or nuts to deal with.)

(Kit Kat's work well, too.)

Step 4:  Eat the chocolate off of the ends.

Step 5:  Now the sides.

Step 6:  Now the top.
 (I realized when I looked at this picture that I probably could have pulled the chocolate off with my fingers instead of using my teeth.  Then maybe you wouldn't have to see the drool I left behind.  But it was sooooooo good.)


Step 7:  Then the bottom.


Step 8:  Lastly, pop the soft little nougat in your mouth and let it melt!

And THAT my friends is how you eat a candy bar!

Good day!


P.S.   I absolutely LOVE that little zig zag pattern on the bottom of candy bars.
If it came in wallpaper I'd line my closet with it. 


Thursday, October 13, 2011

I Love You, Craig, and Your Wonderful List!

    Since moving to Loveland, I have become a craigslist fanatic!  It's right up there on my list with garage sales and thrift stores and clearance aisles.  I check it almost daily to see if there's anything posted that I can't live without.  I'm sure my husband wishes I wouldn't, but I wish he wouldn't watch the bank account like a hawk, so we're even.  I decided to list all of my craigslist purchases over the last 8 months.  I took a picture of everything except the treadmill.  I didn't feel like walking down one flight of stairs into the basement.  Lazy.  I know.  But who really wants to see a picture of a treadmill anyways.  So, let's begin!  First was the guest bedroom furniture...
 We really wanted log furniture for our guest room, but thought it would be way too expensive.  Then I found this!  A queen bed, two night stands, and a small desk (not pictured).  They were asking $400 and I grabbed it!  I like it so much that it might end up in my room, eventually.  Next was the fish tank....

Ian won a fish at the fair this year.  He actually won a gold fish, but some random guy came up and gave us four more winners tickets, which was enough to upgrade to exactly what he wanted.  A beta!  Instead of spending $30 on a brand new setup.  This lady gave me the tank with an air pump, a brand new bottle of food, chlorine drops, a net, and the decorative rocks for $5!  Woo Hoo!  After that came the TV cabinet....
I was perusing through the garage sale section one Friday night.  One post had pictures, and I spotted this.  It's the exact same style of furniture we have in our living room.  I wanted it for the TV in the living room, but it was a few inches too small.  I bought it anyway, not knowing what I would do with it, but for $20 I couldn't let it go.  My neighbor, Marja, and I went that night after 10pm and squeezed it into the back of Brian's ride.  There was about 1 centimeter to spare on all four sides.  I took that as a sign that it was meant to be!  It now resides in the boys room, because I forgot until I got home that it matches their furniture, too.  Now, the ice cream maker....
Brian and I decided one night, after spending $7 a pop at DQ, that we should make our own ice cream.  The $50 machines weren't so appealing though.  Then I found this beauty!  It's an older model, but it works like a charm.  Truth is, it'll probably run forever since the older stuff is usually made better.  It makes enough ice cream to last us almost two weeks, and I paid $5 for it.  Oh yeah!  Moving on to the next piece of furniture....
I had a bare spot between the kitchen and dining room, and I really wanted a piece of furniture there for extra storage.  I didn't want anything too big to have to walk around, though.  One Sunday morning I spotted this.  It's the perfect size!  The lady had recently bought it from Pier 1 and then decided she wanted the black one.  It retailed for $239.99.  I bought it for $75!  I was so happy!  Last, but certainly not least, we found the newest member of our family on craigslist.  Meet Smidget....
Isn't him so chute!  Wook at his tiny wittle wegs!  I've been wanting a male Munchkin kitten for a while, but they come with a hefty price tag.  I almost decided to just get a free kitten when Brian reminded me to be patient and wait until I could find what I wanted.  The very next day I found Smidget (named so because he's a siamese midget)!  Someone had recently bought him from a breeder, and then almost immediately realized a kitten was too much to handle with two very small kids.  Her loss was our gain!  She slapped a clearance price on him and posted the ad.  Luckily I was the first person to inquire, and a few hours later he was mine.  She even threw in the barely used box of litter, a huge bag of kitten food, and a few cat toys.  We love da Smidge!
     So if you've never used craigslist before, you should really take a look at it.  There are so many more things I would have loved to purchase, but Scrooge has a hard time letting go of his moolah!  Well, he has a harder time than I do.  Probably for the best though.  I love you, Scrooge! 

Rachel
Honorary Member of the Craigslist Fan Club Since March of 2011

Friday, September 23, 2011

My Garage Sale "Woo Hoo!"

    For those of you who don't know, I LOOOOOOOOVE GARAGE SALES!  I also like thrift stores, but usually garage sales have better prices and you can bargain with them.  There's no better feeling than going to a garage sale and finding something you really wanted, but didn't want to pay full price for at a department store.  Well today that happened for me!  I was coming home from dropping Ian off at school and what did I see in someones driveway.....a huge stack of reversible floor mats!  You know the kind that are bright colors that lock together like puzzle pieces.  We purchased two packs when we first moved in our house to go on the basement floor where the kids play.  (Please excuse the disaster you are about to see.)

   They cost $21.68 for an 8 pack!  I've been wanting two more packs, but couldn't part with $44 of hard earned cash.  Soooooooo, I raced home and grabbed $20 I had stashed in one of my drawers and raced back to the garage sale.  The guy wanted $20 for the whole stack!  I said YES!
      So I got 40 mats, including the side pieces, for $20.  Retail would have cost me $110!  And yes, they are in great shape!  And guess what..... 
   I got a popcorn maker, too!  I only had $20 so I asked the guy if he'd throw in the popcorn maker and he said sure.  It never hurts to ask!  I just pulled it out of the box.  It's still in plastic and it looks like it's never been used. 

Thank you Jesus for this exciting find today!
I LOVE GARAGE SALES!!
(but not as much as you, Jesus)
 
Sincerely,
An Easily Excited Thrifter

Tuesday, August 30, 2011

Cleaning Makes Cents

    So I'm cleaning my house today and a thought occurred to me.  Well actually many thoughts occurred to me,  like "I really needed to clip my toe nails like a week ago" and "Darn it, I forgot to buy hot dogs Sunday" and "Why is Lightning McQueen in a sock behind the toilet?" and "If I find one more clump of dog hair I'm trading Copper in for a non-shedding poodle!"  But the thought I wanted to share with you pertains to cleaning supplies and detergents and such.  I spend A LOT of money on cleaning supplies.  Especially since we moved.  I've been better about cleaning the whole house weekly instead of.....well I'd rather not say how often I did it before.  I've got a much bigger house now.  I went from one teeny, tiny bathroom to three bathrooms!  We eat most of our meals here instead of at my momma's house.  There's a lot more to clean these days!  Every week I'm buying Pledge or Scrubbing Bubbles or Windex or Gain or Downy or Finish, and those things aren't cheap!  Now cleaning supplies are absolutely necessary so I'm not gonna stop buying them and let my house go to the dogs.  Although if you could see the red hair on my wood floors right now you'd think I already have.  Copper!  But seriously.  There's got to be a cheaper way to keep my house clean.  My husband works really hard for us to have a comfortable life style and for me to stay at home and how do I thank him?  By making the throne smell like "mountain streams."  Let's spend the money on a trip to the actual mountains and play in an actual stream when we get there!  And is it really necessary for my windows to smell like "crystal rain."  I don't recall ever seeing anyone walk through my house sniffing my windows.  The dogs rub there noses on them, but I don't think that counts!   I pay extra so that my wood furniture and my dishes smell like "oranges," my laundry smells like "the tropics" in "April,"  and my bathroom smells like "fresh mountains springs."  And for what!  So I can open the windows and have the smell of cow poop from neighboring farms fill the house (which I do because turning off the ac and opening the windows and letting the breeze blow through the house saves money on our electric bill).  Well no more!  It's time to start cleaning with the basics.  I know my grandma's didn't have all these choices for cleaning products, and there houses were probably cleaner than mine.  So here's where you come in....  I could probably google it and find all the answers I need, but I want to help you while helping me.  Is there something you've always wanted to try, but you've just been to afraid or even lazy to do it.  Tell me!  I'll try it for you!  For instance, there's a recipe for homemade laundry detergent that I've always wanted to try and I've never done it because I'm too scared that I'll go through all the trouble of collecting the ingredients and making it and then I won't like it.  Not anymore.  As soon as I run out of my current $12 detergent I'm gonna whip up a batch of the homemade stuff, which I know is gonna be way cheaper, and I'll let you know how I like it.  Send me any tips or ideas you have by emailing me or leave it as a comment.  I want to start saving some major money this month and I want to help you do it as well.  So get to sending!

Sincerely,
The Woman Who Just Realized She Forgot To Wash Her Hands Between Cleaning The Toilets And Typing This Post 

Sunday, August 28, 2011

Thrift Store Decor


    At this moment I should be either bathing dogs, cleaning the basement, emptying some boxes I have stacked in my living room, or cleaning something in preparation for my parents arrival this Wednesday.  But instead I'm gonna blog!  I had a few compliments today regarding my blog and it's made me want to share something!  I've decided to show you a few things I did in my living room.  Lots of pictures in this one.  I hope you don't mind.  I doubt you will.
    About three weeks ago I made a run to my local Goodwill and then JoAnns.  I love turning other peoples junk into my own treasure.  You can find some cool stuff at thrift stores if you use your imagination and think outside the box.  Oh, and if you're not afraid to use paint!  I spent about $30 at Goodwill and $17 at JoAnns (clearance and sale items only at JoAnns).  A couple of days after that I invited my neighbor and her toddler to Arc Thrift Store with me and my monkeys.  We had a great time going through the aisles and aisles and aisles of outdated decor.  The key is to go through twice.  You always miss something the first time.  In fact, I missed half of my items the first time.  And probably could have gotten more if I'd gone through again!  But I left with $30 worth of gooooood stuff.  Here's what I got in my two trips....

   The first pic is from GW and JA's, and the second pic is from ATS.  So I didn't use every bit of this in my living room, but I wanted to show you what all I got for the moolah!  The black bone shaped picture frames are gonna go in my groom room, and the books were just bribery items to keep my monkeys quiet and under control while I perused the aisles twice....or maybe three times.  They weren't totally effective.  I mean, it kept them occupied, but when I noticed a long line of people staring angrily at me because they couldn't get past because my 2 year old was laying flat on his back across the aisle looking at his book...I got a bit flustered.  Especially when his bones turned to jelly the moment I tried to lift him to a standing position.  Bah!  I just smiled and apologized to all the grumpy people passing by while my little one grunted and flopped and flailed in my arms.  I wonder how I'm gonna pay him back for that one when I'm old and he has to take me places with him.  Maybe I'll do the jelly bones maneuver and slide out of my wheelchair in the produce section at Walmart.  Then he can be the one to pick me up grunting and flailing while people just stare at him like he's an idiot.  Ha!  Anyways...back to my thrift store decor.  There are a few more of these items you won't see again in this post, but I'm using them other places or have plans for them.  So in a previous post you saw I painted the frames for my staircase wall.  In this post I'm going to show you two other items I painted with a pretty blue spray paint.  Unfortunately I didn't get an up close picture of the befores, but here are the afters.  First is a brass colored metal barrel shaped thingy.  I have absolutely no idea what it is, but I liked the shape, so I painted it, distressed it a bit, and threw some smell good pine cones (that I bought at JoAnns on sale) in it.
    I think it's cool.  Then I painted a small candle holder.  It's a pillar style, which I love, but it was dark wood, which I don't love.  So after painting and distressing it a bit, I put it in the white tray I had bought at JoAnns.  The tray was originally $17, but because it was cracked all the way across, they gave it to me for $4.  Score!  I threw in more of the pine cones, which covered the crack, and put it on my coffee table. 
   I love the pop of blue and the red pine cones!  Moving on.....did you see the "whiskey jug" I had gotten at Goodwill.  I loved the shape and I wanted to fill it with green peas to add some color.  However, I did not want to buy $10 worth of peas to put in my $4 jug.  So.......with a hot glue gun and some jute twine I already had I wrapped the bottom half of the jug with the twine and then shoved plastic bags inside.  That way I only had to buy half the peas and you wouldn't see the bags in the bottom.  Also, the screw lid on the jar was plastic, which I did not like, so I cut a piece of burlap I had to put over the lid and tied it down with more twine.  I decided it looked nice on my fireplace. 
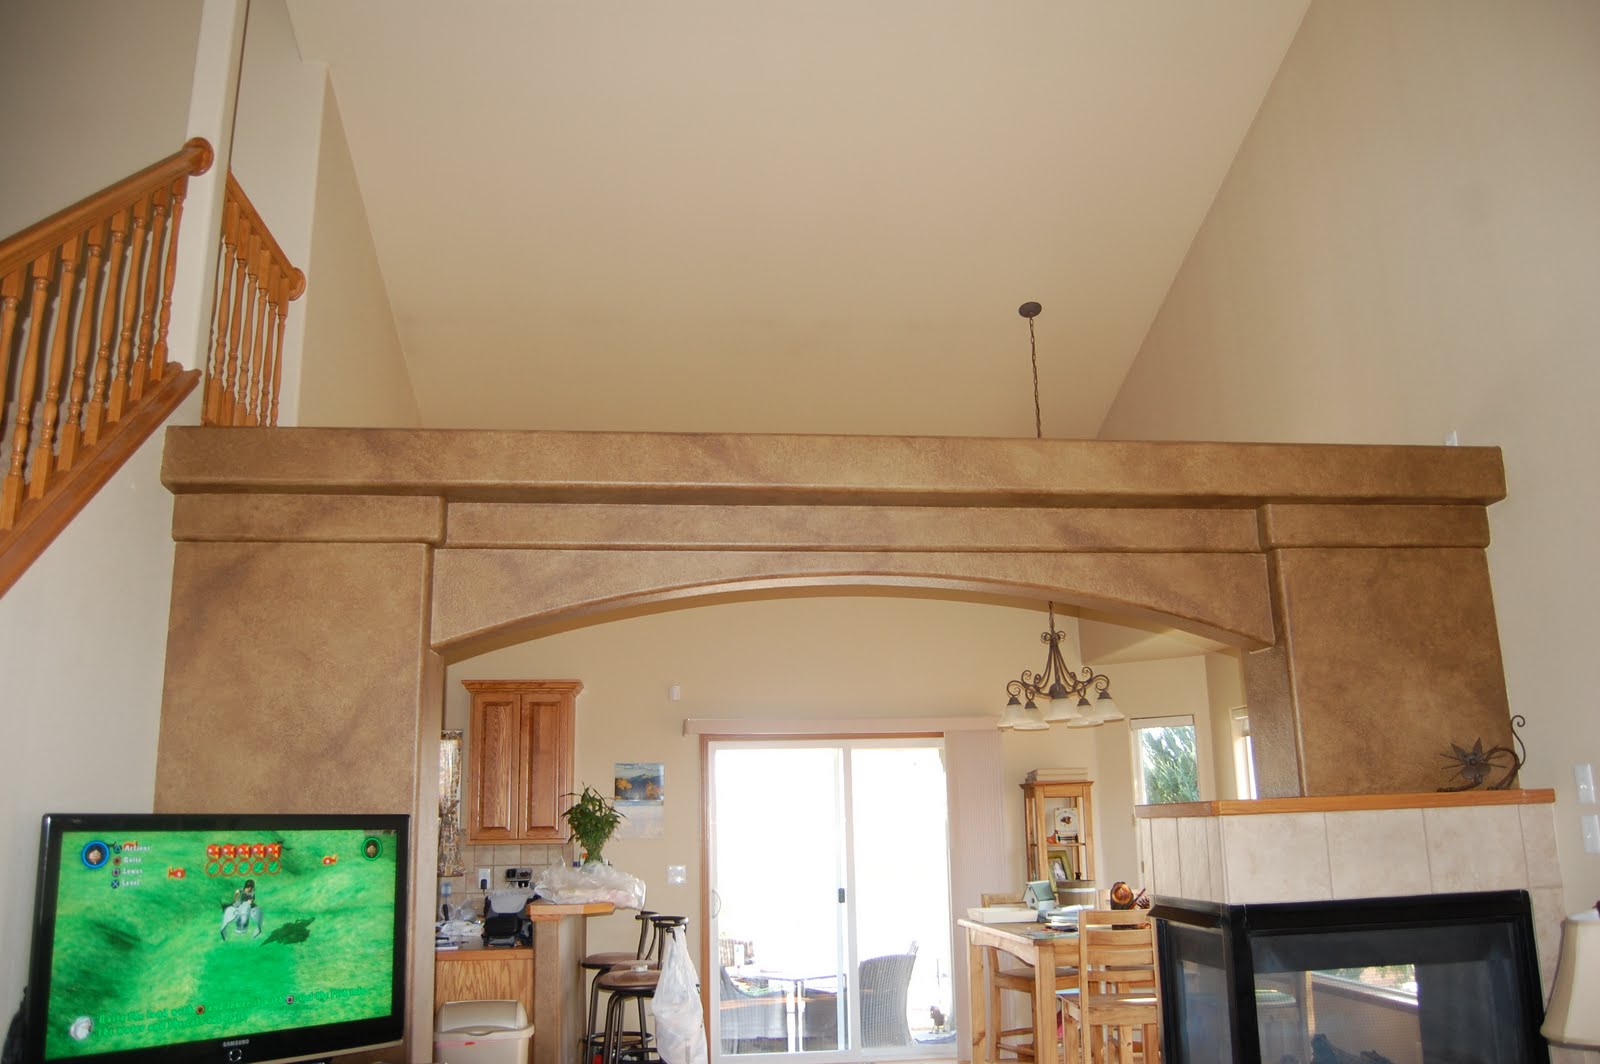
     There are a couple of things I like about this.  The textures from the twine, burlap, and peas, and the colors from the twine, burlap, and peas.  They add so much to the already cool shape of the jug.  Love it!  Okay, so I'll try to wrap this up.  I wanted to put the rest of my super cool thrifty finds on my empty arch.
    Isn't it so sad up there?  But oh the possibilities!  Here were a couple of my favorite purchases....
    I love this little lantern!  It has a broken leg, but you won't be able to see it.  I absolutely adore the shape and glass and metal details.  Here's another cool piece....
    Eeeeeeeee!  I got so excited when I found this.  And look at that price tag...$1.99!  Soap and water and a magic eraser made this baby shine.  I stacked my goodies on each side of the archway.  I would love to have twice the amount I have up there, but if I'm patient I'll find the perfect pieces.  Here's how it turned out.....

    The two baskets and the greenery in the first pic were things I already had, so I stacked 'em up and threw 'em up there.  The cool basket in the second pic is a picnic basket I found at Arc.  The handle was broken so I just removed it.  I love that basket!  I'm aware that the blue barrel shaped thingy needs more pine cones.  I'm working on it.  I've mentioned before that my enthusiasm runs out.  It may take a few months.  I threw the greenery up there because it needed something.  I'd prefer a vase with some tall grass, but I didn't have one.  I guess that means I need to go back to a thrift store.  There's a new one on Lincoln I want to try.  Who wants to go with me?

Awaiting Your Invitation To Go Thrifting,
Rachel


Tuesday, August 23, 2011

Framed!

    Today I'm going to write about something thrifty.  My idea of thrifty is getting what you want without paying very much money.  And by "very much money" I mean the price you'd pay for something brand new in a store.

    We have been in our new home for six months now.  We love this house.  It's everything we wanted (except the fenced yard that I was promised would be the first priority when we moved in. Pft!).   Out of all the houses we looked at this was the only one that had a bit of a Southern feel.  We loved it instantly and knew it was meant for us.  And now it's time for decorating.  Well, it's past time actually, but I've finally come to the point where I just can't stand its bareness anymore.  I decided I want a picture collage going up the stairs.  I love picture walls of randomness.  I'm not a "line it all up" kinda girl.  I'm a "throw it and see where it lands" kinda girl.  I also like the mix and match feel.  So I didn't want a bunch of the exact same frames.  Where's the fun in that?!  So I went to my local Goodwill.  We have an awesome Goodwill.  I poured over the stacks of frames.  I wanted to make sure they weren't broken.  Nothing worse than getting home and realizing the back won't stay closed.  I made sure the glass wasn't broken, obviously.  I wasn't too concerned with size or color.  I just had to like the shape and design.  I bought six frames and didn't pay more than $2.49 a piece for any of them.  Here's what I brought home.  (Ignore the other stuff.  That's for a later blog.)
    After Goodwill I ran by Lowe's and bought a can of brown spray paint.  I chose something with the slightest hint of red in it.  I like color and I didn't want anything too dark.  I removed all the glass and backs and spray painted them all.  I actually added another frame I had bought a while back for another project and never used.  While they were drying I pulled out my Windex and cleaned all the glass.  Then I chose the pictures I wanted to go inside.  All of the frames were 5x7 or larger and I only had the standard 4x6 prints.  So instead of spending more money to print bigger pictures, I simply added a piece of burlap fabric behind each picture as a kind of matting.  I love the way it pulls all the different pics together with a neutral background while adding a little texture.  Four days later I decided to hang them.  (My enthusiasm runs out quickly.)  It took forever for me to pick a good layout for hanging them because random placements are not truly random.  So this is a before and after of that wall....

    See all that empty space farther up the stairs.  I call that the place where dreams come true.  Because one day I'm hoping my hubsband will wake up and say, "The rest of that wall is really bare.  We need to put something there."  And I'll say, "Yeah, you're right.  Some more family pics would look really good.  Ooooo....Maybe with mountains in the background!"  And he'll say, "Oh yeah!  That would look really nice!  Why don't you go ahead and find a photographer for us?"  And I'll say, "Okay!  That's a good idea sweetsie pie."  And he'll gladly pay for and participate in family photos and we'll live happily ever after.  And since I'm dreaming it will truly be a dream come true.  See how the wall got it's name..... 
    Here's an up close shot so you can see the burlap in the back.

    Dawwww....  Isn't that the cutest wittle picture.  Here's another one for the cuteness....
    Precious!  Quite frankly I probably could have hung these pictures on the wall with thumbtacks and people would still think they were wonderful.  Look at Ian's afro puff and Wesley's basketball head.  I miss those tiny wittle guys.  Wait a minute.....they're potty trained now and they weren't then.  Maybe I don't miss them that much.
     Here's the last frame.  I had intended on putting it on the wall, but I like it better on the fireplace. 
    I'm finally able to display some of my favorite snap shots.  So for roughly $12 in frames, $4 in spray paint (which I didn't use all of), and $2 in burlap (which I only used half of) I was able to decorate half of my staircase wall and begin decorating above my fireplace.  Spending $18 to decorate and display my family pics, I'd say that's pretty thrifty! 
    More to come in the decor department.  You saw that table.  I got lots of gooooood stuff. 

Peace,
Rachel